7 Machine Tips for Knitting Reflective Logos without Snagging
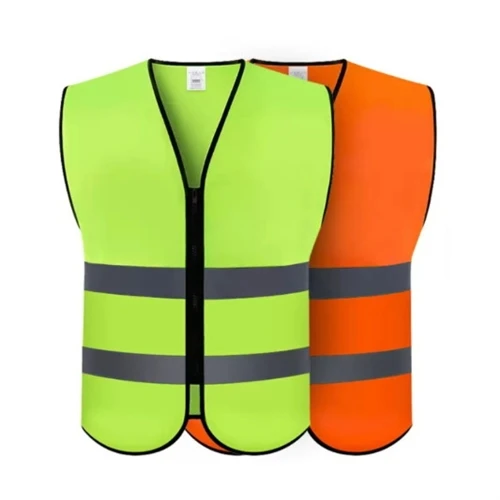
Reflective logos have become a must-have element on hi-vis workwear, sportswear, beanies, scarves and accessories. Knitted reflective logos can look premium and provide 360° visibility-but they also introduce a well-known production nightmare: snagging, broken yarns and high scrap rates.
Unlike normal polyester or cotton yarns, reflective yarns are stiffer, more abrasive and more sensitive to machine conditions. If the settings and structures are not optimized, it doesn't take long before operators see snagged logos, damaged fabric or constant machine stops.
In this guide, we'll walk through 7 practical machine tips for knitting reflective logos without snagging. These tips come from real knitting floor experience and are designed for circular knitting, flat-bed knitting and wool knitting applications that use reflective yarn for knitting and hi vis knitting yarn.
Understanding Reflective Yarn and Logo Structures
How Reflective Yarn Is Built-and Why It Snags More Easily
Most reflective yarns for knitting are made by wrapping or laminating retro-reflective film around a core yarn (polyester, nylon or blend). The reflective layer contains tiny glass beads or micro-prisms which bounce light back to its source. This construction gives strong visibility but also makes the yarn:
Stiffer and less flexible than standard polyester
More abrasive against needles, sinkers and guides
More sensitive to sharp edges or burrs in the yarn path
Because of this, reflective yarn tends to catch at needle hooks, sinker tips or worn guides much more easily than soft filament yarns. Long floats behind the fabric also increase the risk of snagging during wearing and washing.
If you want to reduce snagging, you must treat reflective yarn as a specialty material and adapt your machine settings accordingly.
Logo Types: Intarsia, Jacquard, Inlay and Embroidery
Reflective logos on knitwear are typically executed in several ways:
Jacquard patterns: reflective yarn is knitted into selected needles while ground yarn forms the rest. Risk: long floats at the back of the fabric.
Intarsia logos: reflective yarn is used to form a block or panel on the fabric. Risk: many yarn feeders and tension changes.
Inlay / plating: reflective yarn is laid in between ground loops instead of forming structural stitches. Risk: yarn buckling or "sitting on top" of the fabric.
Embroidery or stitching: reflective thread for knitting or embroidery is applied after knitting. Risk: needle heat and friction on the reflective layer. Topmatched Safety Products+1
Each method has different mechanical loads on the reflective yarn. Jacquards and intarsia can easily produce long floats, which are beautiful in a showroom but unforgiving in daily wear. Inlay and plating often reduce snagging risk, but they require careful yarn tension and take-down control.
Tip 1 – Choose the Right Reflective Yarn and Needle Size
Match Yarn Diameter to Needle Gauge
Because reflective yarn is bulkier and less flexible, using the same needle size as normal yarn can be risky. Too fine a needle or too tight a gauge can cause:
Tight loops that stress the reflective film
Needle hooks that "bite" into the yarn
Excessive friction and micro-breaks in the reflective layer
Practical advice:
For a given machine gauge, start with a slightly lower stitch density in the logo area than in the ground fabric.
When possible, choose a reflective yarn with 0.25–0.5 mm width for fine-gauge machines, and wider yarn for heavier gauges and wool knitting. Many double-sided reflective yarns for knitting specify suggested needle sizes and gauges, which are worth following as a baseline. Topmatched Safety Products+1
Select Yarn Types Optimized for Machine Knitting
Not all reflective yarns are created equal. Some are designed mainly for weaving or narrow tapes, while others are optimized for knitting. When your main purpose is machine-knitted reflective logos, look for:
Soft, flexible base: e.g. polyester or nylon core that bends easily
Even, stable width: reduces the risk of thick spots catching in the needle hook
Good wash durability for workwear or sportswear
Products like reflective yarn for knitting, reflective knitting yarn and hi vis knitting yarn from specialized suppliers are formulated specifically for circular or flat-bed machines.
Tip 2 – Fine-Tune Yarn Tension and Take-Down Settings
Lower Tension for Reflective Feeders
Reflective yarn does not behave like a fully elastic filament. If the feeding tension is too high, you may see:
Yarn stretching and narrowing
Reflective film cracking or delaminating
Higher risk of breakage at the logo edges
Recommendations:
Allocate dedicated tensioners and feeders for reflective yarn, separate from ground yarn.
Start with lower yarn tension than your standard setup and gradually increase until stitches are stable but not stressed.
Monitor the yarn path visually: reflective yarn should feed smoothly without "snapping" into the needles.
Adjust Take-Down to Reduce Fabric Stress at Logos
Take-down pressure directly affects how the fabric is pulled off the needle bed. In the logo area, where you mix ground yarn and reflective yarn, too much take-down can cause:
Over-stretched stitches in the logo
Yarn breakage at pattern transitions
Uneven logo edges and distorted shapes
Try this sequence when tuning:
Reduce take-down slightly when the logo section starts.
Adjust reflective yarn tension so the yarn lays evenly in the loops.
Fine-tune machine speed (see Tip 5) once fabric looks balanced.
Record your "before / after" settings so successful combinations can be repeated in future orders.
Tip 3 – Optimize Stitch Structures Around the Logo
Avoid Long Floats That Catch and Snag
Long floats on the back of the fabric are the #1 enemy of snag-free reflective logos. When the garment is worn or washed, those floats can easily catch on fingers, zippers or accessories.
To minimize this:
In jacquard designs, limit float length by inserting tucks or misses.
Break up wide logo areas into smaller blocks so floats span fewer needles.
For kids' garments, scarves and hats, keep floats especially short and tight.
A logo that looks perfect on a flat board can become a snagging magnet in daily use. Always judge the back side of the fabric with the same care as the front.
Use Supporting Plating or Inlay for Reflective Logos
Instead of letting reflective yarn carry the full structural load in every stitch, consider:
Plating: ground yarn forms the main structure; reflective yarn is plated at the surface.
Inlay: reflective yarn is laid into the fabric while ground yarn knits around it.
Benefits:
Reflective yarn experiences less bending and stretching, reducing snagging and breakage.
Ground yarn maintains fabric softness and comfort.
Logos remain clearly visible on the surface while the fabric stays flexible.
In many cases, shifting from full-stitch jacquard to plated or inlaid structures significantly improves snag resistance and long-term durability.
Tip 4 – Separate Yarn Paths and Use Smooth Guides
Dedicated Feeders for Reflective Yarn
Sharing the same yarn paths for ground and reflective yarns may save hardware, but it increases the risk of tangling and friction. For reflective logos, it's best to:
Assign dedicated feeders and guides for each reflective yarn end.
Avoid sharp changes in direction or tight corners in the yarn path.
Use smooth, polished or ceramic eyelets where the reflective yarn passes.
This reduces yarn-to-yarn contact and keeps the reflective yarn running cleanly into the needles.
Regularly Inspect Needles, Sinkers and Guides
Even with the best yarn, worn machine parts will damage reflective logos. Build a routine to inspect:
Needle hooks and latches for burrs, chips or bending
Sinker tips and edges for sharp spots
Yarn guides and tensioners for grooves and residue
Any roughness can act like a knife on the reflective film. Because reflective yarn is less forgiving than standard yarn, a small defect in the metal can trigger a chain reaction of snags in the logo area.
Tip 5 – Control Machine Speed and Logo Transition Zones
Reduce Knitting Speed in Logo Areas
High machine speed plus stiff reflective yarn is a risky combination. At very high RPM, the yarn has less time to seat correctly in the needle hook, increasing missed stitches and snagging.
Practical steps:
For machines that support it, slow down in the logo area via the pattern program.
If speed control by zone isn't available, adjust the general speed to a safe level that still meets production targets.
Pay special attention when knitting large block logos or bold letters, where many needles switch in and out at once.
Smooth Transition Between Ground and Logo Sections
Snagging often happens at the edges of the logo, where machine settings and yarn feed conditions change quickly. To reduce shock:
Add 2–4 rows of transition structure before and after the logo (e.g. partial plating, lower stitch density).
Keep yarn tension and feed angle as stable as possible across the transition.
Ensure pattern programming does not introduce sudden jumps in needle selection.
This approach makes the fabric behave more gradually, which is kinder to reflective yarn.
Tip 6 – Prevent Static and Reduce Friction
Use Proper Oiling and Anti-Static Measures
Reflective yarns usually don't want heavy oil, but they still need some lubrication and static control:
Apply a light, even oiling compatible with the yarn and end use (e.g. workwear that needs wash durability).
Keep environmental humidity in a comfortable range; very dry air increases static and yarn sticking.
Where necessary, use anti-static bars, sprays or grounding solutions near yarn paths.
The objective is to reduce dry friction without soaking the yarn or contaminating the reflective surface.
Keep Machines Clean Around the Logo Yarn Path
Dust, lint and fiber fly are often overlooked causes of snagging. On reflective yarn feeders:
Regularly clean tensioners, yarn guides and the needle bed.
Remove accumulations of lint which can tangle with reflective yarn.
Include the reflective feeders in your routine cleaning schedule, not just the main ground yarn path.
A clean machine is essential for snag-free reflective logos-especially on high-visibility garments where defects are immediately visible.
Tip 7 – Test, Inspect and Standardize Your Logo Process
Run Swatch Tests for Each New Logo and Yarn
Every new combination of:
Logo artwork
Yarn type / supplier
Machine model / gauge
…should start with a swatch test. Use small samples to confirm:
Logo clarity and visibility
Fabric handfeel and stretch
Snagging risk on both front and back
Wash durability of the reflective area
Record all settings-needle size, yarn tensions, take-down, speed, structure-so you can reference them in future.
Establish Inspection Points to Catch Snagging Early
Add specific inspection steps to your quality control:
Inline checks: operators inspect the logo zones directly on the machine, looking for loose loops, broken yarns and pulled floats.
Finishing checks: QC team tests the logo area by stretching and rubbing the fabric, simulating normal wear.
Catching problems early prevents full-batch rejections and customer complaints.
Create a Standard Machine Setting Sheet for Reflective Logos
Once you have a stable process for knitting reflective logos without snagging, document it:
Machine brand and model
Gauge and needle type
Recommended reflective yarns and ground yarns
Tensions, take-down, speed and structure notes
This "playbook" makes it easier to repeat success across different production lines and orders, and to train new operators.
Case Example – Improving a Hi-Vis Workwear Logo
A hi-vis workwear factory was knitting a large chest logo using reflective yarn on a flat-bed machine. Their main problems:
Yarn breakage in the logo edges
Long floats on the back catching on tools and belts
High rejection rates during final inspection
By applying the tips above, they made several changes:
Switched to a softer reflective knitting yarn recommended for flat-bed machines. Topmatched Safety Products+1
Reduced yarn tension and take-down in the logo area.
Converted the structure from full jacquard to inlay plating, with ground yarn carrying more of the load.
Slowed machine speed by 10–15% when knitting the logo rows.
Replaced worn needles and polished one damaged yarn guide.
The result: the snagging defect rate dropped dramatically, and the customer was able to scale production confidently.
FAQ – Common Questions about Knitting Reflective Logos
Q1: What is the best reflective yarn type for machine-knitted logos?
Look for reflective yarn for knitting or double-sided reflective yarn for knitting with good flexibility and clear technical data. For heavy garments or wool knitting, higher-denier yarns with recommended needle sizes are ideal. Topmatched Safety Products+2Topmatched Safety Products+2
Q2: Can I use the same settings for reflective yarn and normal polyester?
Usually not. Reflective yarn needs lower tension, softer take-down and sometimes slower speed. Treat it as a special yarn and build dedicated settings instead of copying polyester parameters.
Q3: How do I balance logo visibility and fabric softness?
Use plating or inlay structures so ground yarn maintains softness while reflective yarn sits on the surface for visibility. Avoid overly dense logo areas that feel stiff compared with the base fabric.
Q4: How often should I replace needles when knitting reflective logos?
More often than for normal yarns. Because reflective yarn is tougher and more abrasive, it will expose weak or worn needles quickly. A preventive replacement schedule for logo lines can save time and reduce defects.
Q5: Where can I learn more about choosing reflective yarns?
For more guidance on softness, tensile strength and wash durability, see knowledge articles such as "How to Choose Reflective Yarn for Knitting Projects", and compare specifications across reflective thread for knitting, hi vis knitting yarn and related products.
Make Reflective Logos a Reliable Part of Your Knitwear
Knitting reflective logos doesn't have to mean high scrap rates or endless machine stops. By:
Selecting the right reflective yarn and needle size
Tuning tension and take-down
Optimizing stitch structures
Separating and smoothing the yarn path
Controlling machine speed and transitions
Managing friction and static
Testing, inspecting and standardizing your process
…you can knit reflective logos without snagging and deliver consistent quality on hi-vis workwear, sportswear and accessories.
If you're planning a new reflective logo project or facing recurring snagging problems, you can:
Test different reflective yarns for knitting and hi vis knitting yarns from your supplier,
Or contact our team to discuss suitable yarn types and machine parameters for your specific machines and fabrics.