Hi-vis safety clothing should be removed from service when fluorescent background material, retroreflective tape, garment structure, or contamination no longer supports reliable worker recognition. Retirement decisions should use documented inspection criteria rather than garment age alone, because UV exposure, abrasion, washing chemistry, oil contamination, and job function create different degradation rates.
For PPE distributors and HSE managers, the inspection system should cover three measurable areas: fluorescent color shift, damaged reflective surface area, and the replacement-stock safety factor required for each work group.

Why Hi-Vis Clothing Retirement Cannot Be Based Only on Wash Count
Wash-cycle claims provide a controlled laboratory reference, but they do not represent every field condition. A safety vest used inside a clean warehouse may remain serviceable after repeated washing, while the same garment used for asphalt paving, mining maintenance, concrete work, or roadside traffic control may fail much earlier.
Retirement assessment should consider:
Fluorescent fabric chromaticity and visible fading
Retroreflective tape cracking, abrasion, peeling, or contamination
Loss of required background or reflective surface area
Broken closures, torn seams, and damaged side adjustment systems
Permanent oil, paint, bitumen, cement, or chemical contamination
Garment fit changes that obstruct the intended tape layout
Job-specific exposure to sunlight, friction, heat, and industrial washing
A garment can remain mechanically intact while its visual performance has already degraded. For this reason, inspection records should separate fabric condition, reflective material condition, structural damage, contamination, and user fit.
|
Inspection Category |
Typical Failure Mode |
Field Consequence |
Required Action |
|
Fluorescent background material |
Fading, staining, color shift |
Reduced daytime conspicuity |
Compare with approved reference sample |
|
Reflective tape |
Cracking, bead loss, peeling |
Reduced nighttime recognition |
Measure damaged reflective area |
|
Garment structure |
Torn seams, broken zipper, loose binding |
Poor fit or reduced coverage |
Repair only if design integrity is retained |
|
Contamination |
Oil, paint, asphalt, chemical residue |
Optical masking or material attack |
Remove from service if cleaning is ineffective |
|
Size and fit |
Excessive shrinkage or distortion |
Tape and background area may be obscured |
Replace with correct size |
|
Label traceability |
Missing care or identification label |
Maintenance history cannot be confirmed |
Review under site PPE control procedure |
Visual Measurement of Fluorescent Brightness and Chromaticity Drift
Fluorescent yellow-green, orange-red, and red background materials depend on color coordinates and luminance performance, not only subjective brightness. During field inspection, garments should be compared under controlled lighting against an unused approved reference from the same material batch or product specification.
Practical Visual Comparison Conditions
A reliable workshop inspection should standardize the viewing environment:
Use neutral daylight or controlled white lighting
Avoid strongly colored walls that affect visual judgment
Compare clean and dry garments
Place the used garment beside an unused reference sample
Inspect the front, back, shoulder, lower torso, and high-abrasion zones
Record uneven fading rather than judging only the overall color
Check whether dark stains reduce the visible fluorescent area
Visual checks cannot replace laboratory chromaticity measurement, but they can identify garments requiring removal or further testing.
|
Inspection Factor |
Acceptable Field Condition |
Retirement Indicator |
|
Overall fluorescent color |
Similar to approved reference |
明显 dull, brown, gray, or washed-out appearance |
|
Color uniformity |
Minor even aging |
Localized bleaching or large faded panels |
|
Surface contamination |
Removable light dirt |
Permanent dark staining across visible areas |
|
UV exposure pattern |
No major contrast between covered and exposed zones |
Strong shoulder, back, or thigh fading |
|
Fabric finish |
Stable surface and color |
Severe pilling, coating breakdown, or fiber exposure |
Chromaticity Coordinate Drift
Laboratory color assessment commonly uses defined chromaticity coordinates and luminance-factor measurements under specified illumination and observation conditions. A used garment may appear "bright enough" to an operator while its measured coordinates have moved outside the required color boundary.
For high-risk programs, buyers should retain:
Original fabric test reports
Approved pre-production fabric swatches
Production batch shade records
Post-wash comparison samples
Replacement criteria for visible color drift
The inspection process should not mix different fluorescent shades in one comparison set. Yellow-green, orange-red, and red materials require separate references because their acceptable color zones and aging behavior differ.
Field Scoring Method for Fluorescent Fabric
A simple internal scoring system helps HSE teams document decisions consistently.
|
Score |
Fluorescent Fabric Condition |
Recommended Decision |
|
5 |
Matches approved reference closely |
Continue in service |
|
4 |
Slight even fading, no major staining |
Continue with routine inspection |
|
3 |
Noticeable fading or localized staining |
Shorten inspection interval |
|
2 |
Strong color loss or large darkened area |
Replace at next PPE issue cycle |
|
1 |
Severe fading, bleaching, or permanent contamination |
Remove from service immediately |
The scoring system should be validated against the garment specification, worksite risk level, and local PPE policy. It is an internal management tool, not a substitute for formal compliance testing.
Need to establish a repeatable inspection method for bulk vest programs? Share your target standard, garment color, reflective tape type, wash-cycle expectation, and worksite exposure. Our factory team can review sample retention, labeling, replacement criteria, and replenishment planning for Safety Vest orders.
Calculating Allowable Damage to Reflective Tape
Reflective tape performance can be reduced by abrasion, cracking, bead loss, delamination, contamination, and missing sections. Inspection should consider both optical degradation and the physical area lost from the original tape layout.
A small scratch is different from a continuous missing strip around the torso or legs. Damage location also matters because a broken visibility pattern can reduce recognition of the wearer's body shape.
Reflective Area Loss Formula
The damaged-area percentage can be calculated as:
Reflective Area Loss (%) = Damaged Reflective Area ÷ Original Reflective Area × 100
For rectangular damage:
Damaged Area = Length × Width
For several damaged zones:
Total Damaged Area = Area 1 + Area 2 + Area 3 + …
Example:
Original reflective tape area: 240 square inches
Cracked or missing area: 12 square inches
Reflective area loss: 12 ÷ 240 × 100 = 5%
This calculation provides a documentation method, but the final retirement threshold must follow the applicable garment specification, employer policy, and risk assessment. A site should not invent a universal percentage without considering the required tape configuration and remaining compliant area.
|
Damage Pattern |
Measurement Method |
Inspection Concern |
|
Single rectangular tear |
Length × width |
Local loss of reflective surface |
|
Multiple small abrasion zones |
Add each damaged area |
Cumulative optical loss |
|
Continuous horizontal break |
Measure missing strip length and width |
Interrupted body-recognition pattern |
|
Peeling tape edge |
Measure lifted width and length |
Progressive delamination risk |
|
Surface dullness without missing tape |
Directional-light comparison |
Optical loss may exceed visible physical damage |
|
Oil or paint covering tape |
Measure contaminated area |
Reflective surface is optically blocked |
Why Square-Inch Calculations Are Not Enough
A garment should not remain in service only because its total damaged area is numerically small. The following conditions may justify immediate retirement:
A full-width break across a torso band
Missing tape at the shoulder transition
Large damage at the front or rear centerline
Reflective tape covered by permanent oil or paint
Delamination that continues after washing
Cracked micro-prismatic film with poor directional response
Reflective tape hidden by distorted garment fit
The inspection must preserve the intended visibility pattern, not merely a percentage of material.
Glass-Bead Tape Versus Micro-Prismatic Tape Damage
|
Reflective Material |
Main Optical Structure |
Common Wear Pattern |
Field Inspection Method |
|
Glass-bead tape |
Microspheres returning incident light |
Bead loss, surface abrasion, dirt retention |
Flashlight comparison and surface examination |
|
Micro-prismatic tape |
Polymer prisms within film structure |
Cracking, puncture, film delamination |
Directional light at several viewing angles |
|
Segmented reflective transfer |
Separate reflective segments bonded to fabric |
Segment lifting and edge failure |
Flex garment and inspect bond points |
|
Printed reflective film |
Reflective coating or transfer layer |
Surface cracking and print loss |
Compare logo or printed area under direct light |
|
Reflective piping |
Narrow reflective insert |
Edge wear and seam damage |
Inspect curved and stitched sections |
Glass-bead tape may look gray or uneven when beads are lost. Micro-prismatic tape can retain a smooth appearance while internal prism damage reduces performance at certain angles. Inspection staff should therefore use more than one viewing position.
Building a Replacement Safety Factor by Job-Specific Wear Rate
PPE replenishment should be based on observed retirement rates rather than a fixed annual percentage for every department. Workers in road paving, mining maintenance, steel fabrication, concrete construction, utilities, and warehouse operations expose garments to different levels of UV radiation, abrasion, dirt, washing, and mechanical stress.
Replacement Stock Formula
A practical procurement formula is:
Required Replacement Stock = Expected Retirements × Safety Factor
Expected retirements can be estimated as:
Issued Garments × Historical Retirement Rate
Example:
Garments issued: 1,000
Annual retirement rate: 22%
Expected retirements: 220
Safety factor: 1.20
Replacement stock: 220 × 1.20 = 264 garments
The additional 44 garments cover demand variation, urgent onboarding, size imbalance, contamination incidents, and delayed replenishment.
|
Work Group |
Typical Wear Drivers |
Example Annual Retirement Rate |
Suggested Planning Factor |
|
Indoor warehouse staff |
Moderate washing, low UV exposure |
8%–15% |
1.10 |
|
Road construction crews |
UV, asphalt, traffic dust, abrasion |
20%–35% |
1.20–1.30 |
|
Mining maintenance teams |
Oil, dust, metal abrasion, heavy washing |
25%–40% |
1.25–1.35 |
|
Utility field workers |
Climbing, weather, tools, vehicle contact |
18%–30% |
1.20–1.30 |
|
Concrete and masonry crews |
Cement dust, kneeling, rough surfaces |
25%–45% |
1.25–1.40 |
|
Short-term visitors |
Low usage, fit variation, loss risk |
5%–12% |
1.15 |
These ranges are planning examples. Each buyer should replace them with site data collected from issue logs, wash records, repair reports, and retirement inspections.
Size-Level Safety Stock
Total replacement quantity is not enough. PPE buyers should maintain stock by size because wear rate and employee turnover are uneven.
|
Size Group |
Share of Workforce |
Recommended Stock Review |
|
S |
8% |
Keep minimum emergency quantity |
|
M |
24% |
Monitor monthly usage |
|
L |
34% |
Hold the largest replenishment reserve |
|
XL |
22% |
Track contractor demand separately |
|
2XL–3XL |
12% |
Avoid stockouts caused by low forecasting attention |
A size shortage can force workers into oversized or undersized garments, which may distort reflective tape position, reduce comfort, and cause workers to modify the garment incorrectly.
Seasonal Procurement Timing
Replacement demand often rises before summer construction, winter road maintenance, refinery shutdowns, infrastructure projects, or contractor onboarding periods. The reorder point should include production lead time, shipping time, customs clearance, warehouse receiving, and internal PPE distribution.
|
Supply Stage |
Planning Input |
|
Sample and approval |
Fabric, color, tape, logo, size set |
|
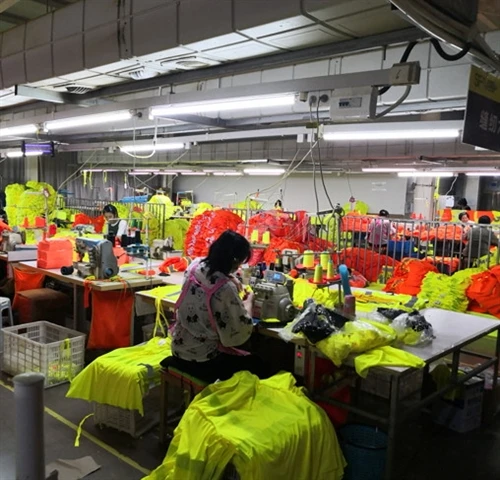
Bulk production |
Cutting, sewing, reflective tape attachment, inspection |
|
Freight |
Air, sea, rail, or courier lead time |
|
Customs and receiving |
Clearance, warehouse booking, quantity inspection |
|
Internal issue |
Department allocation and employee sizing |
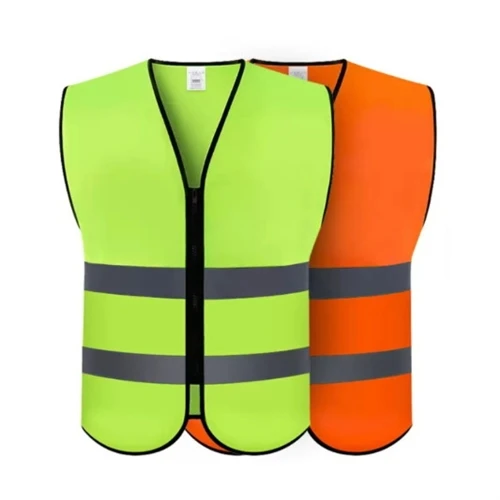
For repeat ANSI Class 2 Safety Vest programs, the factory should retain approved fabric color, reflective tape specification, logo position, carton marking, and size ratio to reduce variation between replenishment batches.
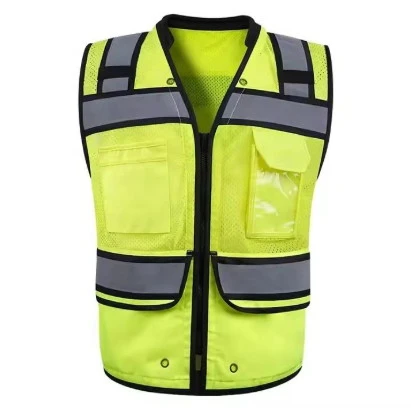
Workshop-Level Hi-Vis Safety Vest Inspection Procedure
A practical inspection procedure should be short enough for supervisors to use and detailed enough to support retirement decisions.
Step 1: Clean and Dry the Garment
Do not inspect a wet or heavily soiled garment unless the contamination itself requires immediate retirement. Dirt can temporarily mask reflective tape and fluorescent fabric condition.
Step 2: Confirm Garment Identity
Check product type, size, batch information, care label, issue date, and user department. Missing labels may prevent wash-history or material verification.
Step 3: Inspect Fluorescent Background Material
Compare the garment with an approved reference under consistent lighting. Record fading, discoloration, permanent stains, tears, and reduced visible area.
Step 4: Inspect Reflective Tape Under Directional Light
View the garment from the front, rear, and side using a flashlight positioned near eye level. Mark cracked, peeling, dull, contaminated, or missing tape sections.
Step 5: Measure Damaged Areas
Record reflective damage in square inches or square centimeters. Photograph major defects and calculate cumulative area loss where required by the internal procedure.
Step 6: Inspect Closures and Garment Structure
Check zipper, hook-and-loop closure, snaps, side adjustment, binding, shoulder seams, pockets, and elastic components. Structural failure can affect fit and visibility coverage.
Step 7: Assign a Disposition
Use one of four outcomes:
|
Disposition |
Meaning |
|
Return to service |
No material defect affecting use |
|
Monitor |
Minor wear; shorten inspection interval |
|
Repair and reinspect |
Repair does not change visibility layout |
|
Retire |
Optical, structural, contamination, or fit failure |
Repair Versus Retirement
Repair is acceptable only when it restores garment function without reducing the required fluorescent or reflective layout. Sewing over reflective tape, covering fluorescent fabric with patches, shortening the garment, or replacing tape without approved materials may alter the original design.
|
Defect |
Repair Decision |
|
Loose non-visibility seam |
Repair may be acceptable |
|
Small pocket seam failure |
Repair and reinspect |
|
Broken zipper |
Replace if garment fit and coverage remain correct |
|
Torn fluorescent panel |
Usually replace unless approved repair restores area |
|
Peeling reflective tape |
Replace garment or use controlled factory repair |
|
Permanent chemical contamination |
Retire |
|
Missing care or traceability label |
Review under site policy |
|
Severe size distortion |
Retire |
For multi-site or regulated projects, repair procedures should define approved thread, stitch type, patch material, reflective tape, heat-application parameters, and inspection responsibility.
Procurement Data HSE Managers Should Send to Suppliers
A repeat-order request should include more than the product name. The following information reduces variation and supports replacement planning:
Target visibility standard and garment classification
Fluorescent fabric color and material weight
Reflective tape technology, width, and layout
Domestic or industrial wash-cycle requirement
Logo method and approved artwork position
Size ratio and replenishment quantity by size
Expected work environment and contamination type
Packaging, individual labeling, and carton-mark requirements
Inspection sample quantity before shipment
Required production and delivery dates
For China manufacturer, supplier, and factory sourcing, buyers should request approved sample retention and batch-level production records. Repeat orders should be checked against the previous fabric shade, reflective tape appearance, garment measurements, logo placement, and packaging configuration.
FAQ
Q: How often should a safety vest inspection be completed?
A: Inspection frequency should follow worksite exposure. Monthly checks may suit low-risk indoor use, while roadwork, mining, utility, and heavy-construction garments may require weekly or pre-shift checks. Any garment exposed to chemicals, asphalt, paint, fire, or severe abrasion should be inspected immediately.
Q: Can damaged reflective tape be replaced instead of retiring the garment?
A: Replacement is possible only when the repair uses an approved reflective material, preserves the original tape layout, and is applied under controlled temperature, pressure, stitching, or bonding conditions. Field patches should not reduce required background material or create discontinuous visibility patterns.
Q: How much replacement stock should PPE buyers keep for hi-vis clothing?
A: Use historical retirement data by job and size. Calculate expected retirements, then apply a safety factor of approximately 1.10–1.40 according to wear rate, supply lead time, workforce changes, and project risk. High-abrasion crews generally require the largest reserve.
Planning a replenishment order for worn or retired hi-vis garments? Send your annual issue quantity, historical retirement rate, size ratio, fabric color, reflective tape specification, and required delivery date. Our factory team can review replacement quantities, retained samples, packing, and repeat-order consistency for safety vest programs.